If you’re looking for a healthy and fun way to treat your dog, making homemade dog biscuits is a great option. Not only can you control the ingredients to ensure your pet gets only the best, but you can also tailor the recipe to suit your dog’s dietary needs. This detailed guide will walk you through a dog biscuit recipe that’s easy to follow, with tips on ingredients, preparation, baking, and storage. Let’s get started!
Key Takeaways:
- Homemade dog biscuits offer control over ingredients and cater to your dog’s dietary needs.
- Choose dog-safe ingredients like oats, pumpkin, and peanut butter for a nutritious treat.
- Follow the step-by-step recipe to ensure you get the right texture and taste for your dog.
- Learn how to store and preserve your dog biscuits to keep them fresh longer.
- Customizable recipes: You can adjust the ingredients based on your dog’s preferences or health conditions.
Why Make Homemade Dog Biscuits?
Homemade dog biscuits are a healthier alternative to store-bought treats, which may contain preservatives, artificial flavors, or allergens that aren’t good for your pet. By making them yourself, you can use high-quality ingredients like peanut butter, pumpkin, and oats, which are not only safe for dogs but also packed with essential nutrients.
Not to mention, making dog biscuits at home can be a fun and rewarding bonding experience for you and your pet!
Essential Ingredients for Dog Biscuits
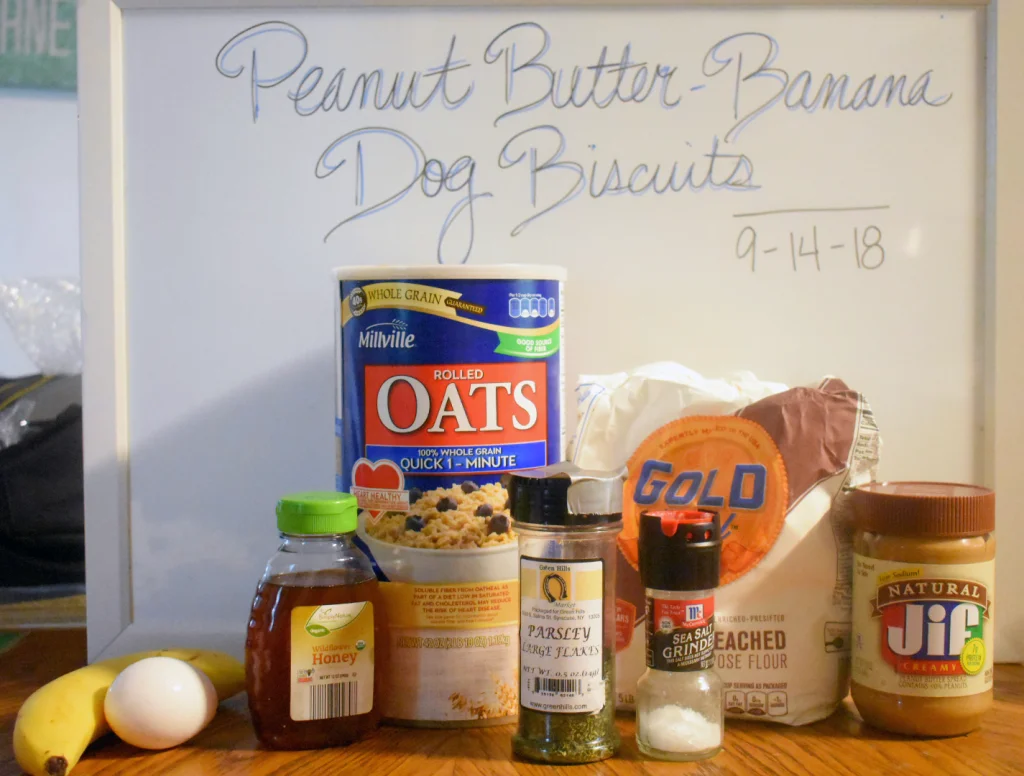
Let’s break down the basic ingredients required for this dog biscuit recipe, so you know exactly what you need:
| Ingredient | Quantity | Purpose |
|---|---|---|
| Whole wheat flour | 2 cups | Provides structure and fiber. |
| Rolled oats | 1/2 cup | Adds fiber and a nice texture. |
| Peanut butter (unsweetened) | 1/4 cup | Adds flavor and protein. |
| Egg | 1 large | Acts as a binder and adds protein. |
| Pumpkin puree | 1/4 cup | Offers vitamins and a healthy digestive aid. |
| Water | 1/4 cup | Helps bring the dough together. |
Optional Add-ins:
- Carrot (grated): For added vitamins and crunch.
- Apple (shredded): A sweet treat that’s healthy for dogs.
Remember, avoid ingredients like chocolate, raisins, and artificial sweeteners (e.g., xylitol), as they are harmful to dogs. Make sure to choose natural peanut butter without added sugar or salt.
Step-by-Step Dog Biscuit Recipe
Here’s how you can make delicious and healthy dog biscuits:
Step 1: Preheat and Prepare Your Baking Tools
Preheat your oven to 350°F (175°C) and line a baking sheet with parchment paper to prevent sticking.
Step 2: Mix the Dry Ingredients
In a large bowl, combine whole wheat flour and rolled oats. Stir them together until well mixed. These form the base of your biscuits.
Step 3: Add Wet Ingredients
In a separate bowl, mix together peanut butter, egg, and pumpkin puree. Stir until smooth and fully combined. Add this mixture to your dry ingredients.
Step 4: Combine and Add Water
Stir the wet and dry ingredients together until you form a dough. If the dough feels too dry or crumbly, add a small amount of water (a tablespoon at a time) until you get a dough that is firm but not sticky.
Step 5: Roll Out and Cut Shapes
On a lightly floured surface, roll the dough out to about 1/4-inch thickness. Use cookie cutters to create fun shapes (bones, hearts, or whatever your dog loves). You can also use a knife to cut the dough into squares or strips.
Step 6: Bake the Biscuits
Place your dog biscuit shapes on the prepared baking sheet. Bake in the preheated oven for 20 to 25 minutes, or until the biscuits are golden brown and firm. The baking time may vary depending on the size of your biscuits.
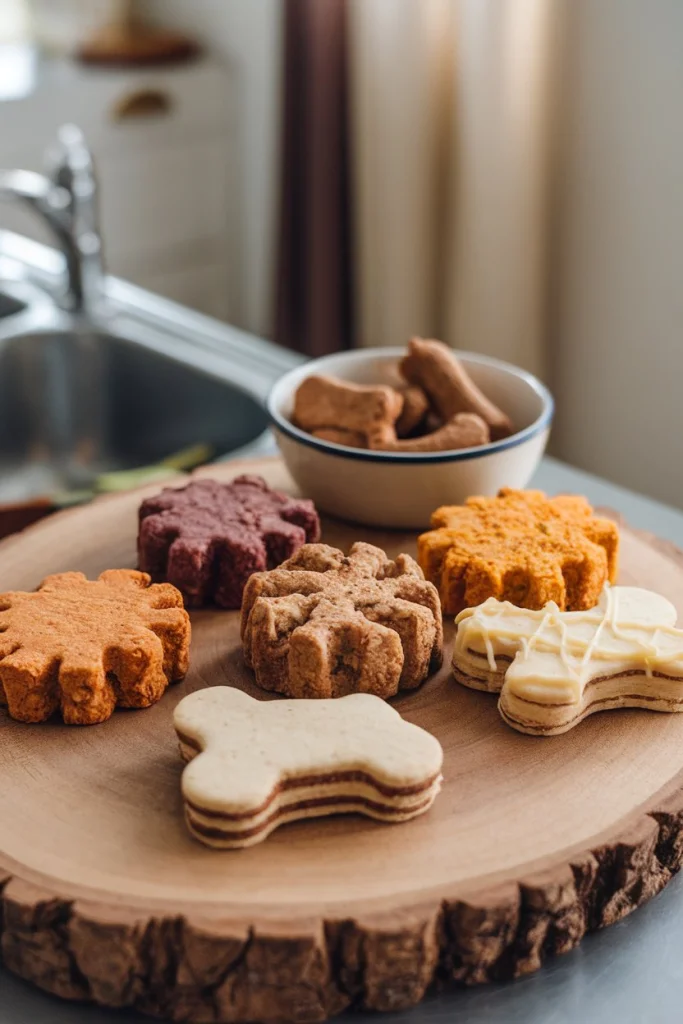
Step 7: Cool and Serve
Let the biscuits cool completely on a wire rack. Once they are cooled, you can serve them to your dog! They make great training treats or just a tasty reward for being a good dog.
Tips for Perfect Dog Biscuits
- Storage: Store your homemade dog biscuits in an airtight container. They can last for about a week at room temperature. For longer storage, you can freeze them for up to 3 months.
- Customize the Flavor: You can swap out the pumpkin for other dog-friendly fruits or vegetables like sweet potatoes or carrots for variety.
- Size Matters: Adjust the size of the biscuits according to your dog’s breed and size. Larger dogs may enjoy bigger biscuits, while smaller dogs will appreciate smaller, bite-sized treats.
- Don’t Overbake: Keep an eye on the biscuits as they bake. Overbaking can lead to a hard texture, which might be difficult for some dogs to chew.
Why Choose Homemade Dog Biscuits Over Store-Bought?
While store-bought dog treats are convenient, they often come with additives, preservatives, and artificial flavors. Homemade dog biscuits, on the other hand, are made with fresh, wholesome ingredients that can be tailored to your dog’s dietary preferences and needs. For instance, if your dog has sensitivities to certain grains, you can make these treats gluten-free by swapping out the wheat flour for rice flour or almond flour.
Additionally, making your own dog biscuits can be cost-effective, especially if you’re making them in batches and storing them for later use.
Where to Find Quality Ingredients for Dog Biscuits?
If you’re looking for premium ingredients to make your dog biscuits, consider checking out reputable pet product stores like Global Wholesale Pet. They offer a wide range of products, ensuring you’re using the best ingredients for your furry friend.
Conclusion
Making homemade dog biscuits is a fun, rewarding, and healthy way to spoil your dog with a tasty treat. This easy dog biscuit recipe is packed with nutrients, and the flexibility of ingredients makes it suitable for dogs with different dietary preferences.
By following this guide, you can make personalized treats for your pet that are not only delicious but also healthy and safe. So, why not try it today and see how your dog reacts to their fresh, homemade biscuits?